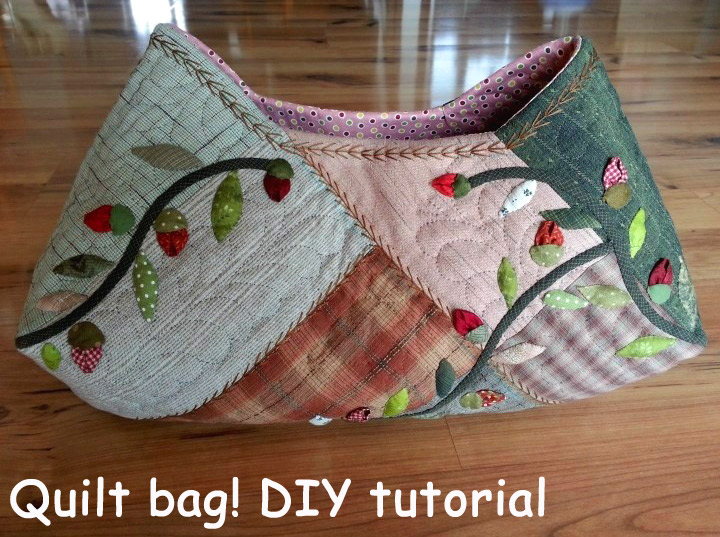
Quilt bag, dress with applique flower another view Quilt bag! Pattern. DIY tutorial.
Сумка в стиле пэчворк-квилт. Этапы шитья в фото.
Сумка в стиле пэчворк-квилт. Этапы шитья в фото.
japanese quilts patterns / выкройка


Beautiful bag, and lovely photos, if you put some measurements or create a PDFs, we could purchase the pattern! Keep up with the lovely designs.
Absolutely beautiful, but with no measurements, I am going to be pondering this one for ages trying to work it out. I don't see how the lining is done either. There is fancy stitching on the outside bit ther does not appear to be any inside. Very confusing. Hate to get lovely designs but no instructions.
Thanks for the good photos - I'm looking forward to making this one.
Every time I look at the photos, I get another ah-ha moment. I think I can do this. May just need to start with one rectangle and make a cardboard pattern. Was thinking about dollar bill size, maybe narrower. It really doesn't matter. All the other pieces are based on your first rectangle. Your finished bag may be a little bigger or smaller. Decide if you want/need batting, then sandwich your layers, right sides together (batting on top or bottom but NOT between), stitch leaving an opening to turn. Looks like little pockets were added to lining.The folding up part looks most exciting.
But it really looks like a learn-as-you-go project. My ideas might be off but I want to try this!
Oh! I forgot to say thank-you for sharing this!
Beautiful bag - but not sure I could duplicate your results. I liked the comment of trying a cardboard pattern and adjusting to learning as you go.
bellissima mi piace molto grazie per la condivisione ma ritengo che mettere anche le misure sarebbe più completa !!!!
I have admired this bag for months. It is now pieced, lined and quilted and has stems attached. I forgot about the inside pockets, so I will have to attach them by hand after I add the rosebuds and leaves. If I had thought beforehand, I would have tried quilting the top to unlined batting, then attaching pockets to the lining before attaching the lining. I based the pattern on 4”x 8" and 4" x 12" rectangles, with two of the larger rectangles having an extra diagonal half of a 4" square added to the pattern before cutting. These measurements do not include seam allowances. So far it looks promising as far as the size and shape go. Those pictures are excellent, but tutorial with an English translation would be fantastic. This lady is so artistic, and the bag a credit to her.
Just realised I made a mistake in those sizes. Extra triangles were NOT added. Instead two of the 8" x 4" rectangles had a half of a 4" x 4" square sliced off. Sorry about that. It is some time since I constructed this part of the bag.
Bigfoot, great to have some measurements. I was considering trying it with 3" squares. How large did your purse turn out to be? Thanks!!
Hi Pennie. I worked out the sizes and everything today. I re-drew the pattern pieces and scaled them up.Then I made a paper model of the bag. I managed to work out exact fabric measurements,batting and lining size,and finished bag size.The scale up includes seam allowances.
See the quilted tote bag here
Bellissima. Grazie per aver condiviso come si fa. Laura
Wonderful bag, I'm dying to try to make it. I just drew out the design (quilting pieces) on graph paper, so I think I could convert it to the rectangles and half square triangles. Certainly would be a challenging project. How fun that would be!
Post a Comment